
With a buttery, flaky crust to counter its tart-sweet undertones, this cherry tart recipe wonderfully captures the taste of fresh cherries. Not only do these mini cherry tarts look and taste incredible, but making them is also shockingly easy. The recipe is also rather flexible and can be readily altered to be vegan-friendly, gluten-free, or low in sugar. These little cherry tarts’ elegant appearance and cherry-popping taste will wow your guests and make the ideal afternoon tea centerpiece.
Ingredients & Utensils
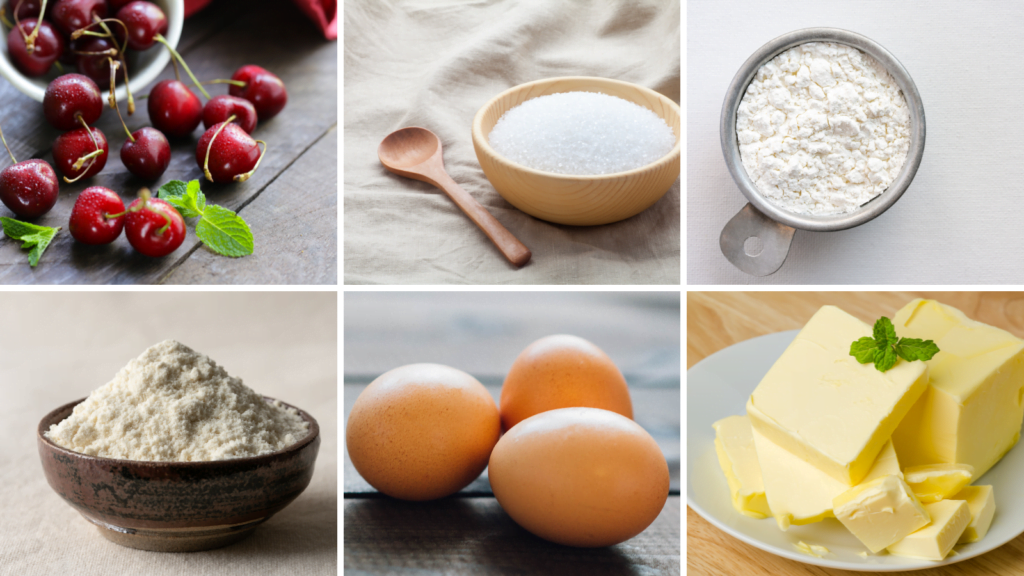
Cherry Filling Ingredients
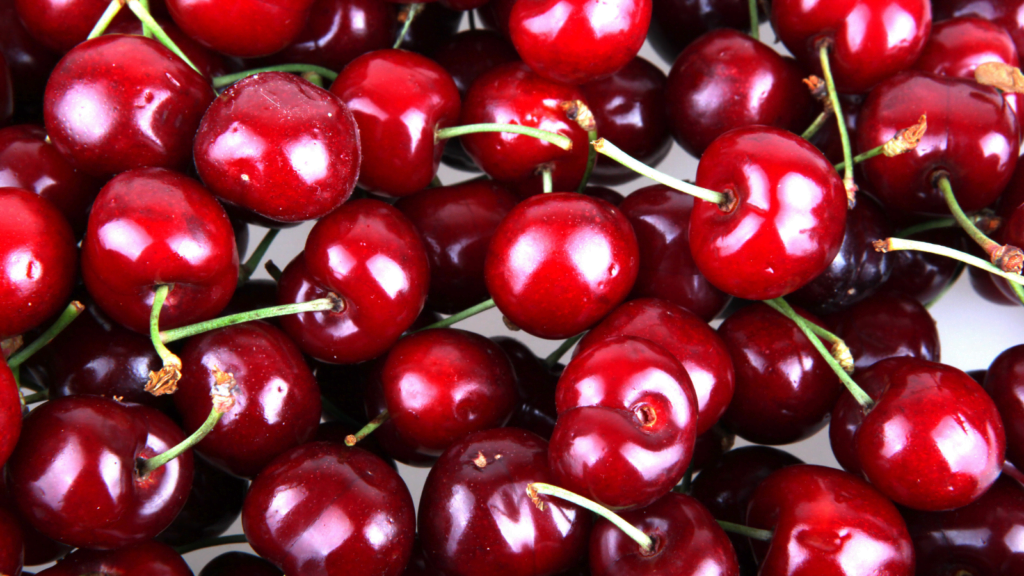
Cherries: Fresh, pitted sour cherries are ideal; nevertheless, frozen or canned cherries also taste great. Before using the frozen cherries, be sure they are well-thawed and well-drained to remove any extra moisture. Either keeping the frozen cherries in the refrigerator overnight or setting a bowl at room temperature for one to two hours can help to thaw them.
Sugar: White granulated sugar. You can cut down on the sugar for a healthy option by switching out white granulated sugar for:
- Stevia: Stevia is a zero-calorie, natural sweetener. Check the package for conversion ratios before usage; it is far sweeter than regular sugar.
Coconut Sugar: Coconut sugar has a lower glycemic index than regular sugar, and it’s easy to use in place of powdered sugar in a 1:1 ratio. Coconut sugar also has a subtle caramel flavor that might enhance your cherry tarts’ flavor.
Cornstarch: The cherry juices are absorbed by the cornstarch, which thickens the filling to a uniform gel-like consistency. Tapioca starch can also be used as an alternative, which gives a more translucent and glossy finish.
Fresh Lemon Juice: Lemon juice balances the sweetness of the cherries and sugar and thickens the mixture. Since it’s a natural preservative, the tarts will keep fresher for longer.
Butter: Butter makes the filling creamier and smoother, giving it a richer, velvetier feel.
Almond Extract: The almond extract’s rich, sweet, nutty flavor complements cherries, boosting their flavor. If almond extract is unavailable, vanilla extract will do in a pinch.
Pastry Ingredients
In this cherry tart recipe, you will make the pastry from scratch, however, you are more than welcome to buy ready-made pastry sheets or dough if you want to save time.
Flour: The best flour is all-purpose flour. For gluten-free choices, think about using oat flour or another gluten-free flour mix. Pastries made with gluten-free flour are less elastic and more crumbly on their own, so you will want to add a binding agent like xanthan gum or an extra egg to increase the elasticity.
Sugar: White granulated sugar or coconut sugar can be used as an alternative.
Unsalted Butter: Cold, unsalted butter cubes are perfect. Cold butter is necessary to get a flaky texture in the baked pastry.
Eggs: Egg yolks are used to bind all the ingredients together when rolling the dough to form a stable crust. For a vegan-friendly option, combine 1 tablespoon of flaxseed meal or chia seeds with 3 tablespoons of water for each egg.
Cold Water: The colder the water, the better. Cold water helps in the preparation of the dough in a number of ways. It prevents the dough from getting too sticky, which makes handling it simpler. Cold water also slows down the development of gluten, making the pastry more delicate and flaky when baked.
Utensils
- Large Mixing Bowl.
- Measuring Cups and Spoons.
- Plastic Wrap: To cover the dough.
- Rolling Pin.
- Round Cookie Cutter. If you do not have a cookie cutter, you can cut out circles of dough for the tart shells with a glass.
- Muffin Tin or Tart Pans.
- Fork.
- Parchment Paper: To line the tart shells during baking.
- Dried Beans or Pie Weights: To weigh down the tart shells in baking.
- Wire Racks: To cool the baked tart shells.
- Medium Saucepan.
- Wooden Spoon or Silicone Spatula.
- Spoon or Scoop: To fill the tart shells.
- Whisk
Cherry Pitter: Recommended if you are using fresh cherries.


How To Make Cherry Tarts
Step 1: Get The Dough Ready.
In a large mixing bowl, add the all-purpose flour, sugar, and salt. Gradually cut in the cold butter until the mixture looks like big bits.
Next, add the egg yolk and mix it in well.
Add the ice water one tablespoon at a time, mixing until the dough comes together.
Shape the dough into a ball, wrap it in plastic wrap, and chill for at least 30 minutes.
Step 2: Bake The Tart Shells
Preheat your oven to 375°F (190°C).
Sprinkle the dough with flour and roll it out until it’s about 1/8 inch thick.
Cut the dough into circles suited for your tart pans or muffin tray.
Press the dough circles into the pans and remove the excess dough.
Pierce each tart shell’s bottom with a fork to prevent the dessert from puffing up while baking. Line each shell with parchment paper and then fill it with pie weights or dry beans.
After you have preheated the oven, bake the tarts for 15 to 20 minutes, or until the edges start to become golden brown.
Once the tart shells are golden brown, remove the parchment paper and weights to clean the bottoms; bake for a further five minutes.
Once completely baked, remove the tart shells from the oven and arrange them on a wire rack to completely cool.
Step 3: Make The Cherry Filling
In a medium saucepan, combine the cherries, sugar, cornstarch, vanilla essence, and lemon juice.
Cook for about 10 minutes over medium heat, stirring frequently, until the mixture thickens and the cherries soften.
Turn off the heat and mix in the butter till it melts.
Let filling cool to room temperature.
Step 4: Assemble The Cherry Tarts
After the filling and tart shells have cooled, carefully spoon generous portions of cherry filling into each tart shell.
Chill the cherry tarts for at least an hour before serving to allow the filling to solidify.
Recipe FAQs and Tips
What Kind of Cherries Should I Use?
Fresh sour cherries, sometimes known as tart cherries, are ideal. The sour cherries’ inherent tart taste makes a good contrast with the added sugar’s sweetness. Thus, if you decide to use sweet cherries, you will need to alter the sugar amount so that the tarts are not overly sweet.
You can also use canned tart cherries, which are also fine to use and are more convenient because they already have the pits taken out. However, you can tell the difference between fresh and canned cherries by how they look, taste, and feel. Fresh cherries will retain their brilliant plump appearance, making the tart appear fuller and have a firmer texture. Canned sour cherries are also occasionally preserved in syrup, which might add unnecessary sugar to the recipe.
How to pit cherries?
With a cherry pitter:
The quickest and most convenient method for pitting cherries is to use a cherry pitter. Insert the cherries into the pitter, then squeeze it to get the pit out of the cherry. The pit will exit through the bottom, leaving the cherry intact.
With a straw or a chopstick:
Remove the stem from the cherry and set it on a cutting board. Holding the cherry steady with one hand, use a straw or chopstick in the other to pierce through the top where the stem was. Press down on the pit until it comes out of the bottom.
Making Use of a Knife
With a paring knife, make a small cut around the cherry and cut it in half along the natural seam. To avoid cutting through the pit, use careful and precise movements. Twist the two halves gently in opposite directions to separate them. Take the pit out of the half that still has it with your fingers or the tip of the knife.
Storing & Freezing Cherry Tarts
Correct storage and freezing of cherry tarts guarantees their taste and texture. If you intend to eat the tarts within a day or two, you can keep them at room temperature for temporary storage. Stow the tarts in an airtight container or cover them loosely with plastic wrap. Putting the tarts in a sealed container and putting them in the fridge will keep them fresh for up to four or five days. This keeps the pastry crisp and the contents fresh. If the tarts are refrigerated, let them come to room temperature when you’re ready to serve; this improves their taste.
Cherry Tarts Freezing Frozen Whole Tarts
To avoid condensation and sogginess, make sure the cherry tarts are totally cooled before freezing. To guard against freezer burn and extend freshness, firmly wrap each tart with plastic wrap. Arrange the wrapped tarts in a heavy-duty freezer bag or an airtight container and place them inside the freezer. The frozen cherry tarts will stay fresh for up to 1 month in the freezer.
Separately Freezing Tart Shells & Filling
If you’re making the cherry tarts in advance, it’s recommended to freeze the tart shells and filling separately. Bake and cool the shells totally before freezing; then carefully cover them with plastic wrap and store them in an airtight container or freezer bag. After making the cherry filling, let it cool fully and then put it in a sealed container or a freezer-safe bag, leaving some room for expansion.
Thawing
When you’re ready to thaw and reheat, take whole tarts or tart shells from the freezer and put them in the fridge overnight. To speed thawing, let the tarts at room temperature for several hours until fully thawed.
Reheating
To restore crispness to the tart shells, preheat the oven to 350°F (175°C), place the thawed tarts or tart shells on a baking sheet, and warm them for 5–10 minutes. If you’re in a hurry, you can use the microwave to reheat the tarts but this method might not restore the pastry’s crispness as effectively.